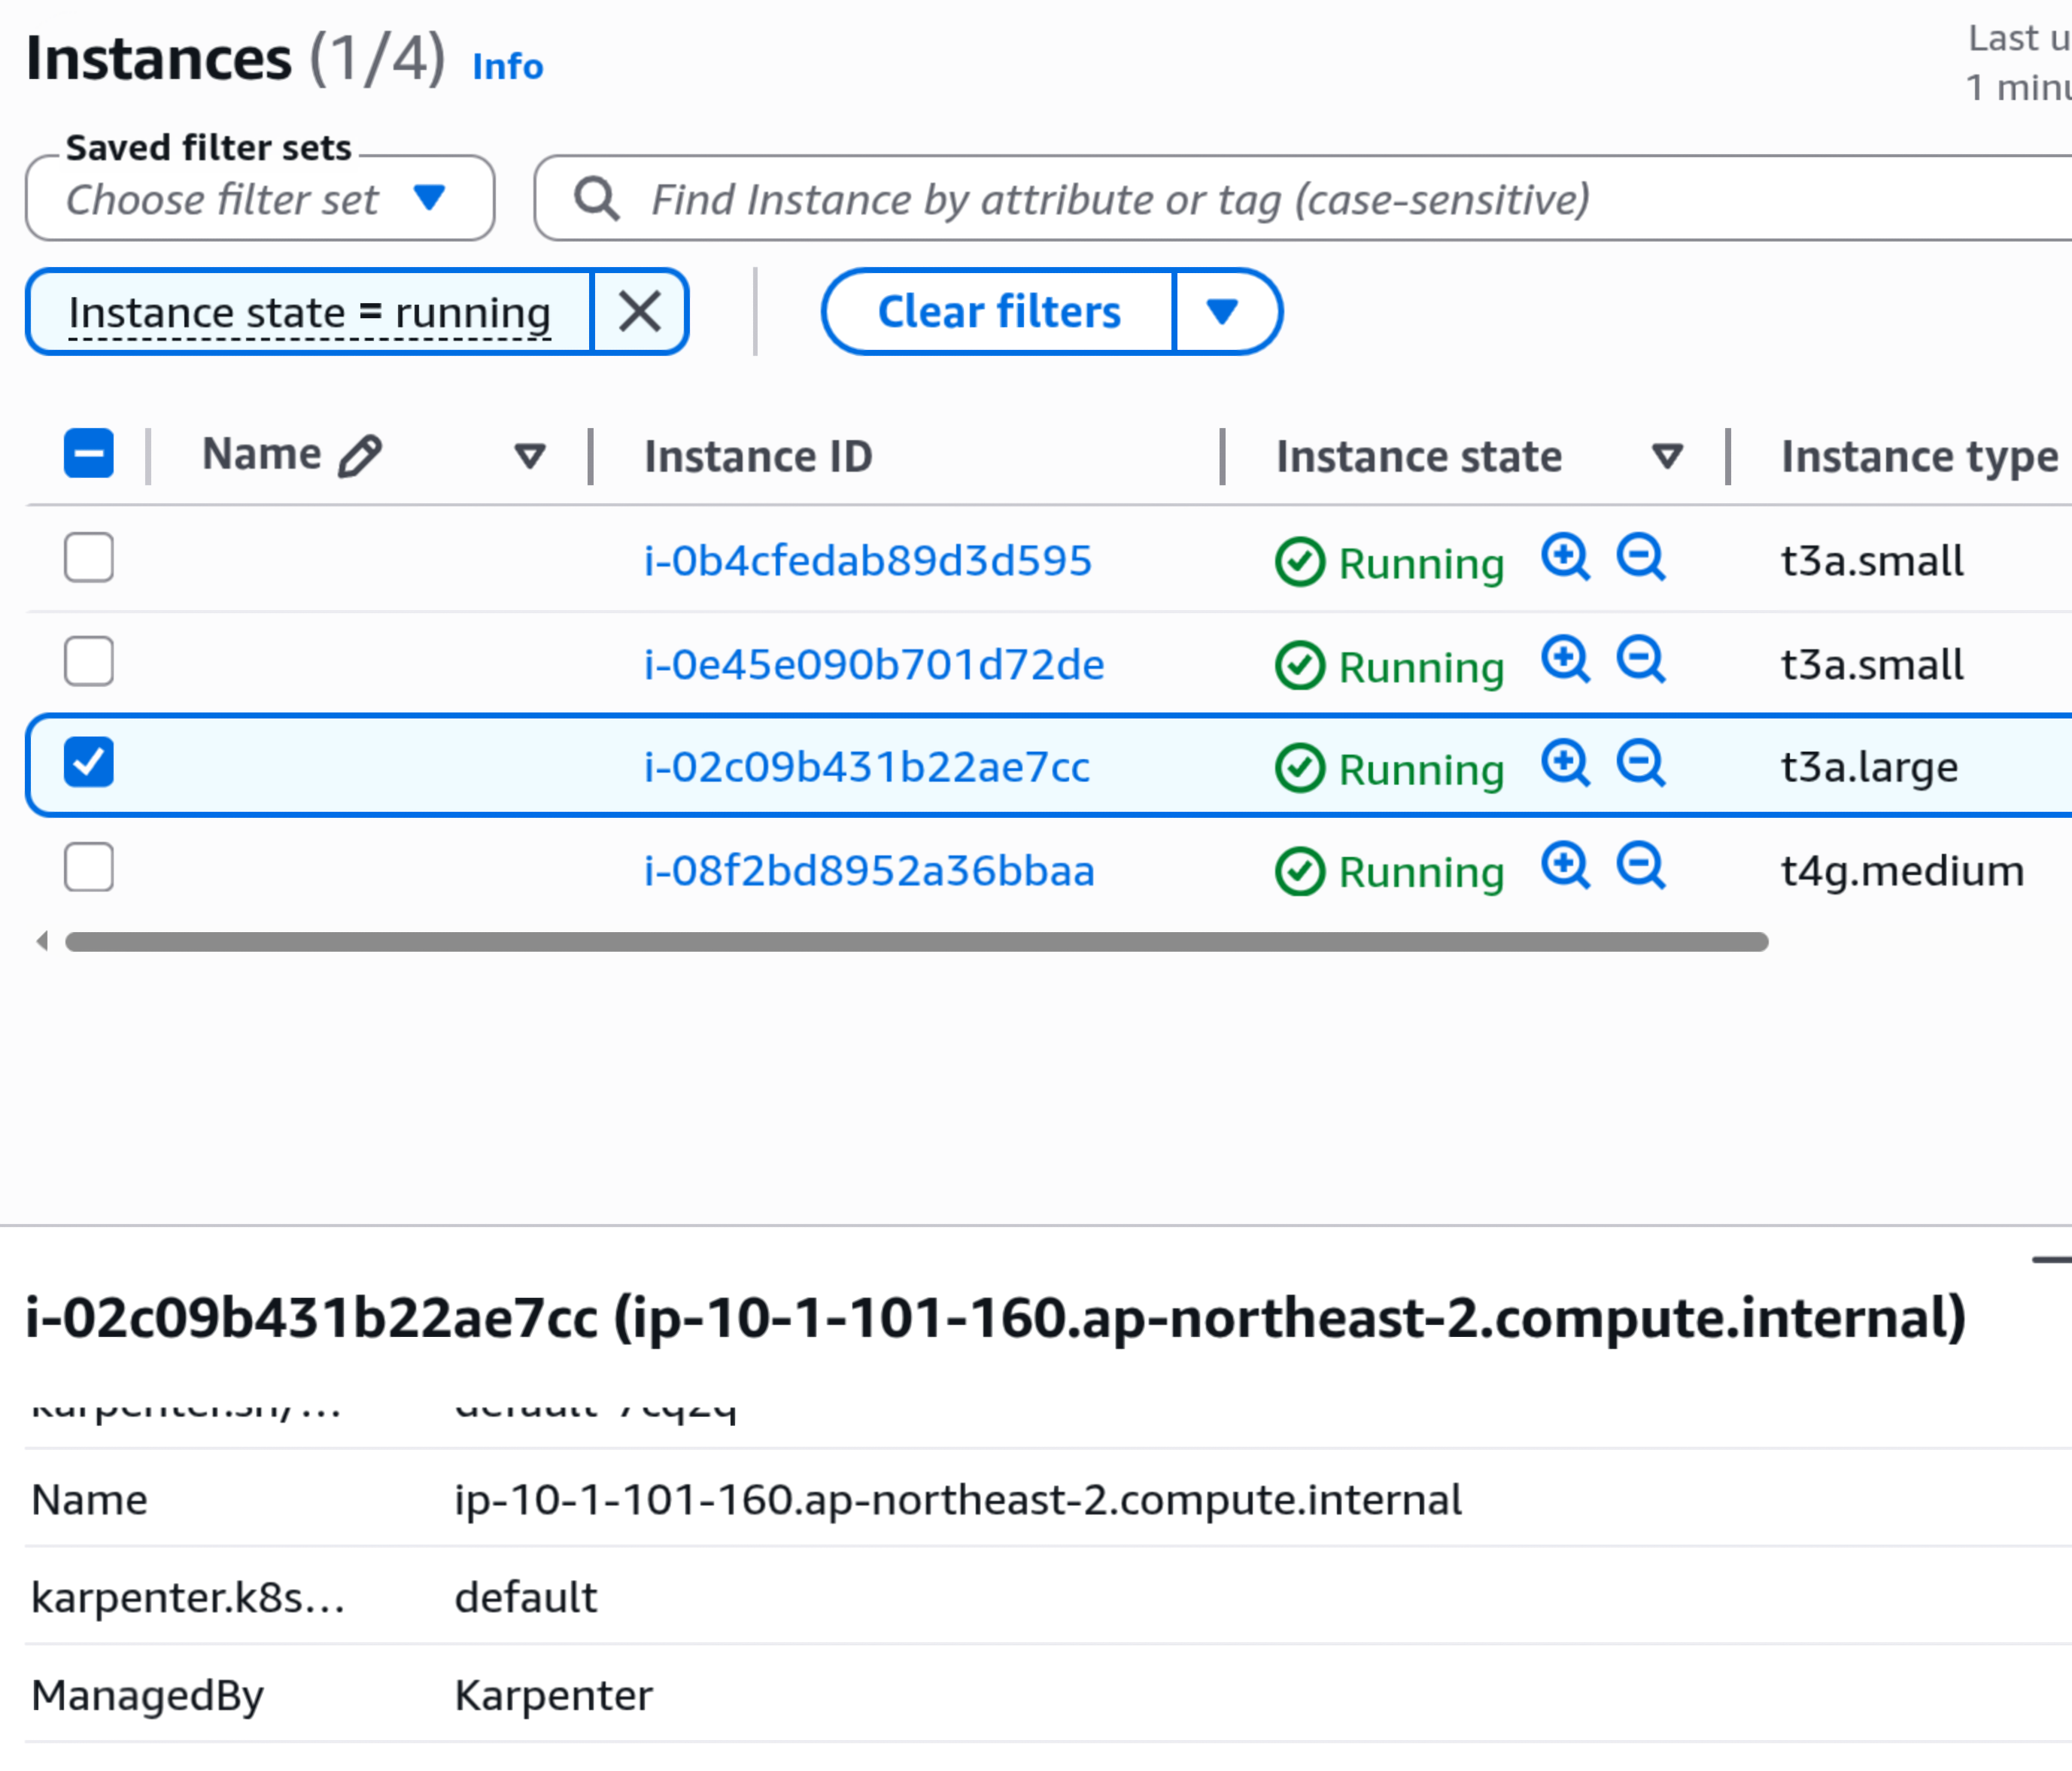
❓ What is Karpenter?
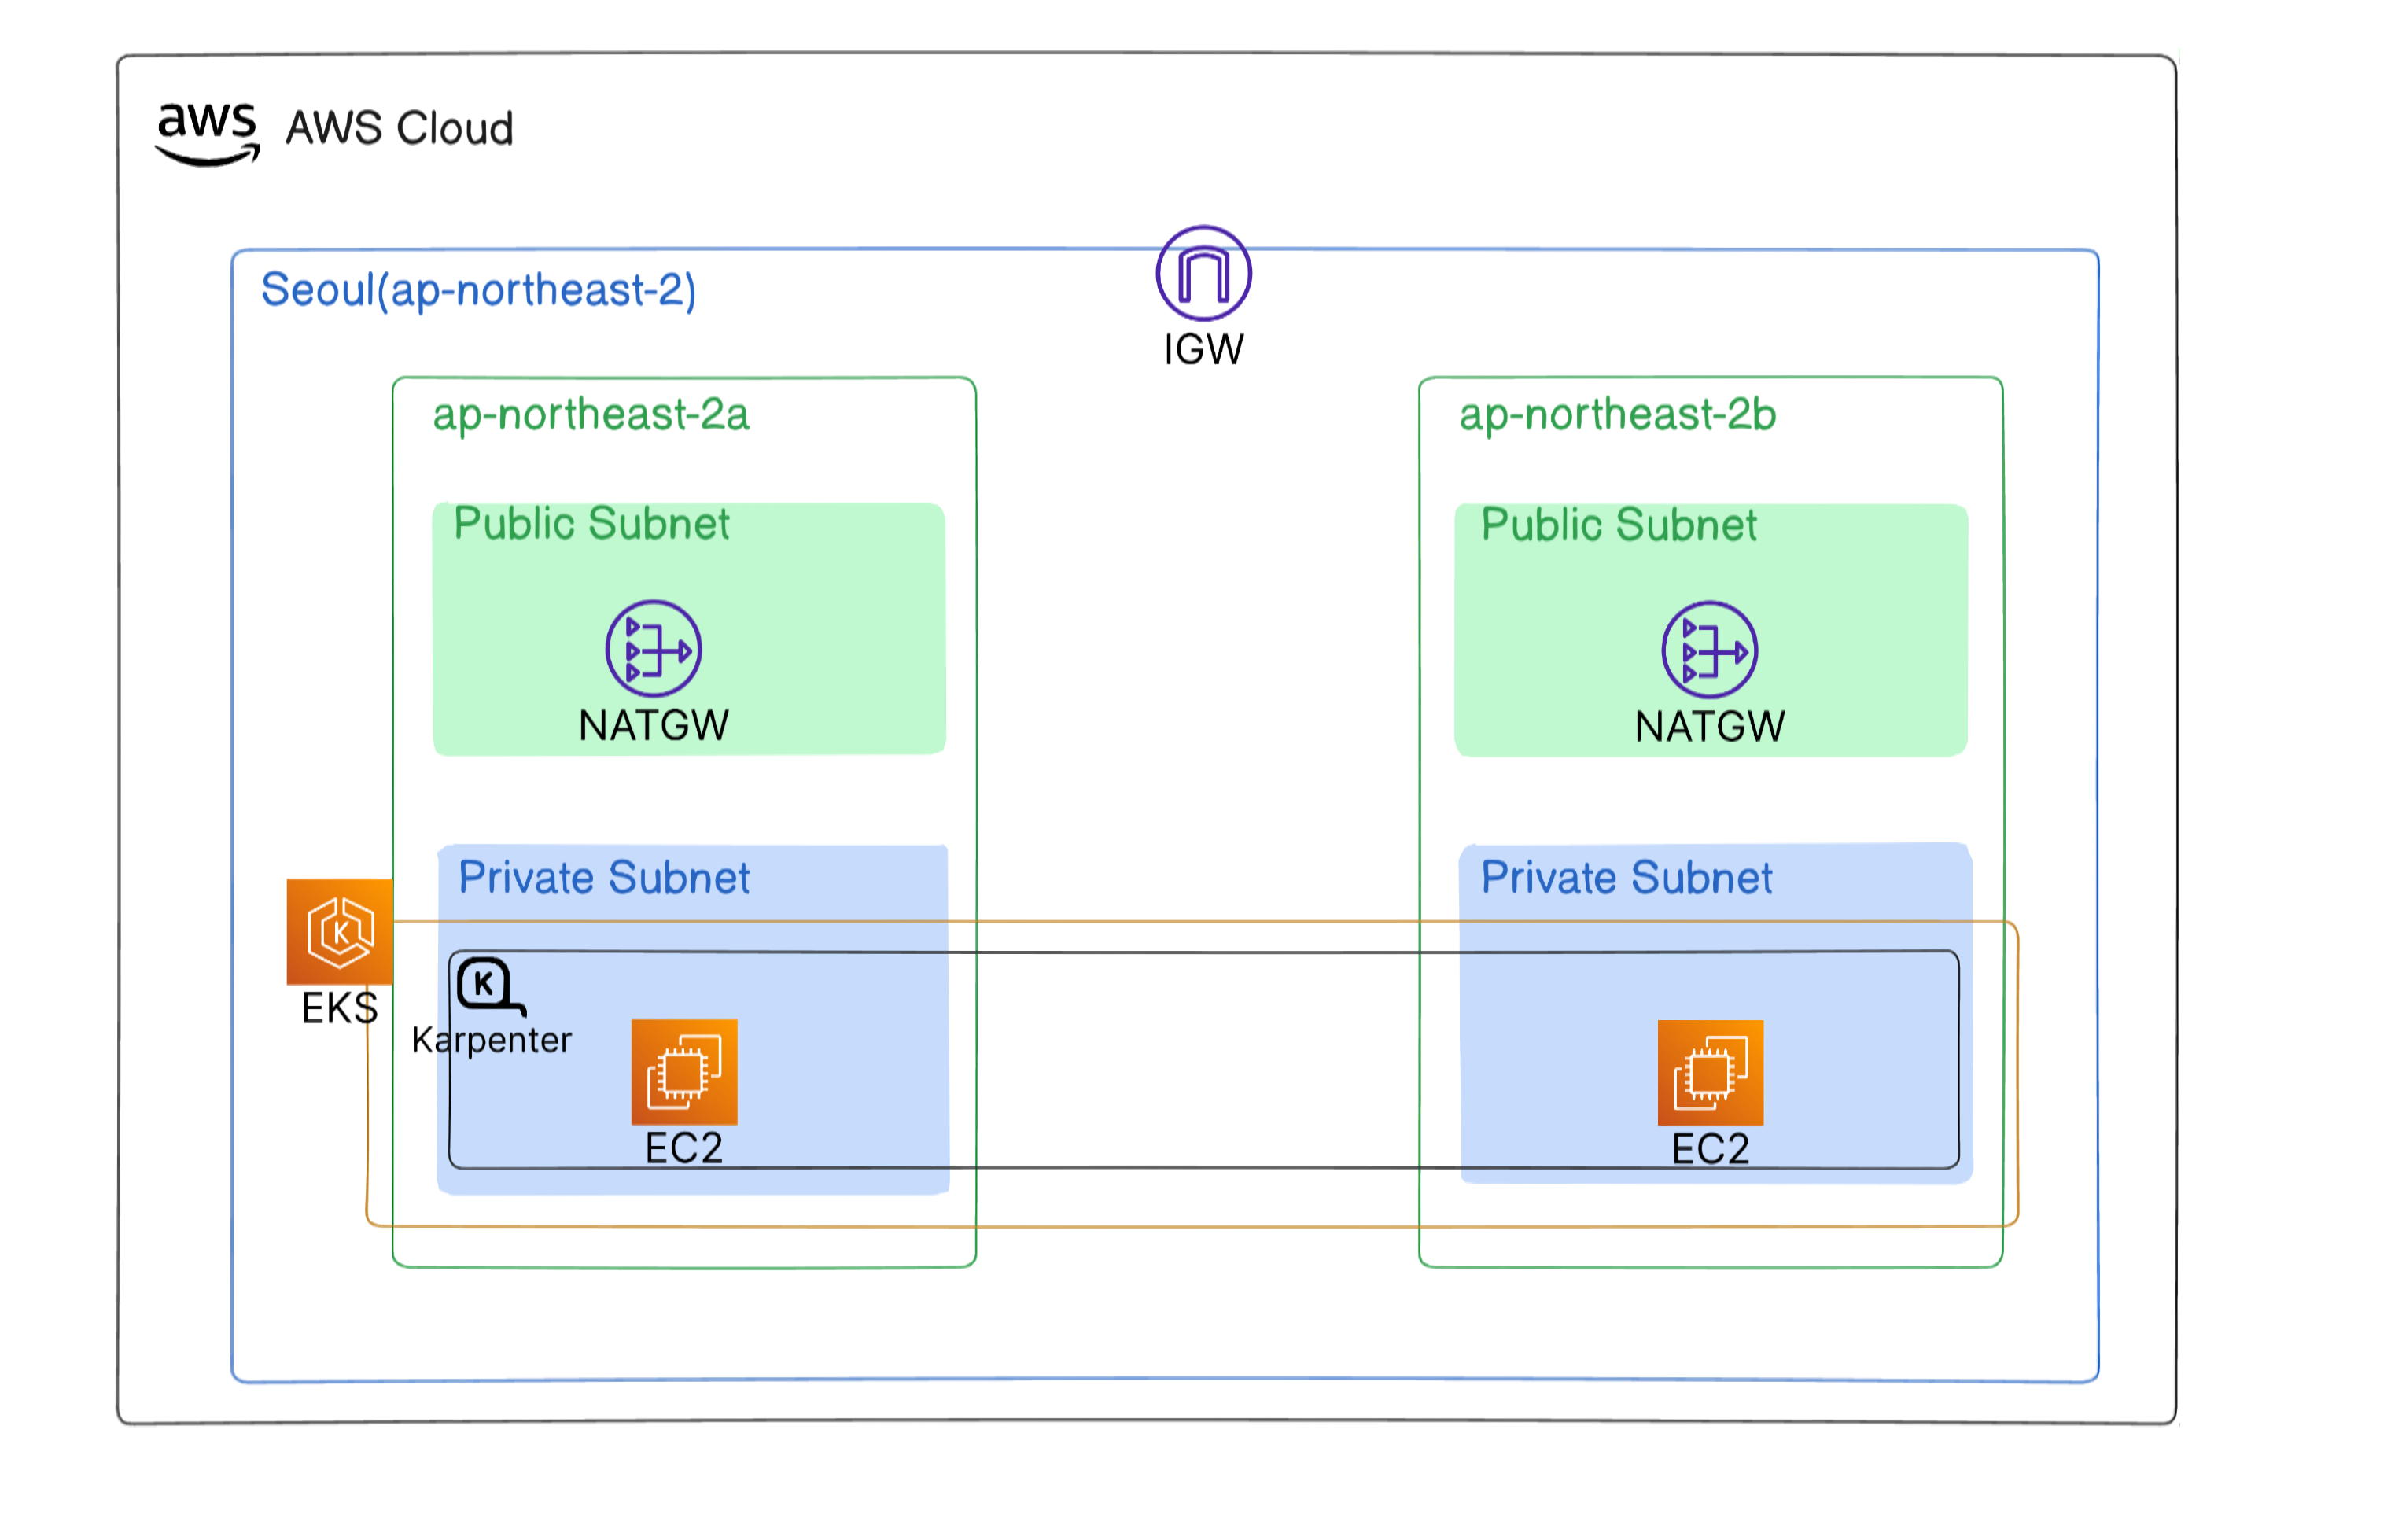
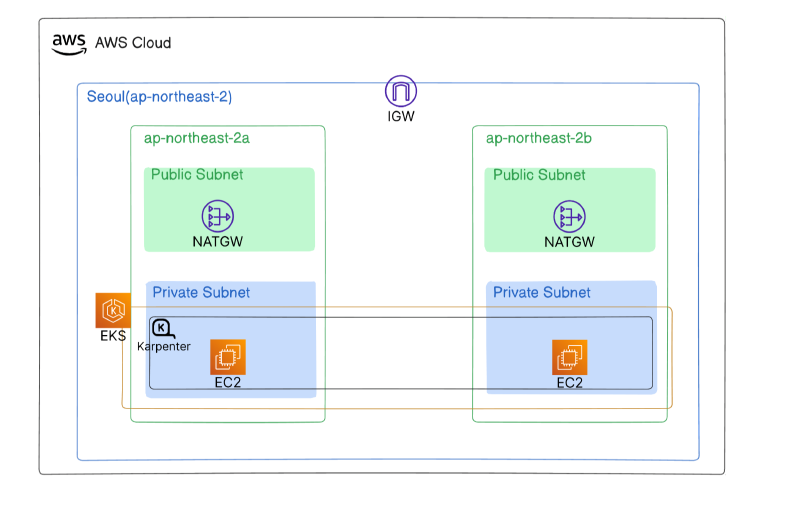
Karpenter is a Kubernetes node autoscaler designed for cloud-based Kubernetes environments.
It is most commonly used with Amazon EKS, which is the standard and recommended approach.
It can also work in non-EKS AWS environments, though this is not generally recommended.
In addition, Karpenter-style autoscaling is available or supported in other cloud environments such as AKS and Alibaba Cloud.
Karpenter provides several key advantages:
- Automatic node scaling: When there are unscheduled pods, Karpenter provisions new worker nodes so that those pods can run.
It can also remove or replace nodes when they are no longer needed. - Cost efficiency: Karpenter optimizes worker node usage based on pod resource requests, using bin-packing to reduce waste.
- Speed: Karpenter is generally faster than Cluster Autoscaler, the traditional node autoscaling approach for EKS.
When you run EKS with Auto Mode, AWS manages Karpenter automatically for you.
However, EKS Auto Mode can cost more than operating a self-managed EKS cluster.
🚀 How It Works
Provisioning
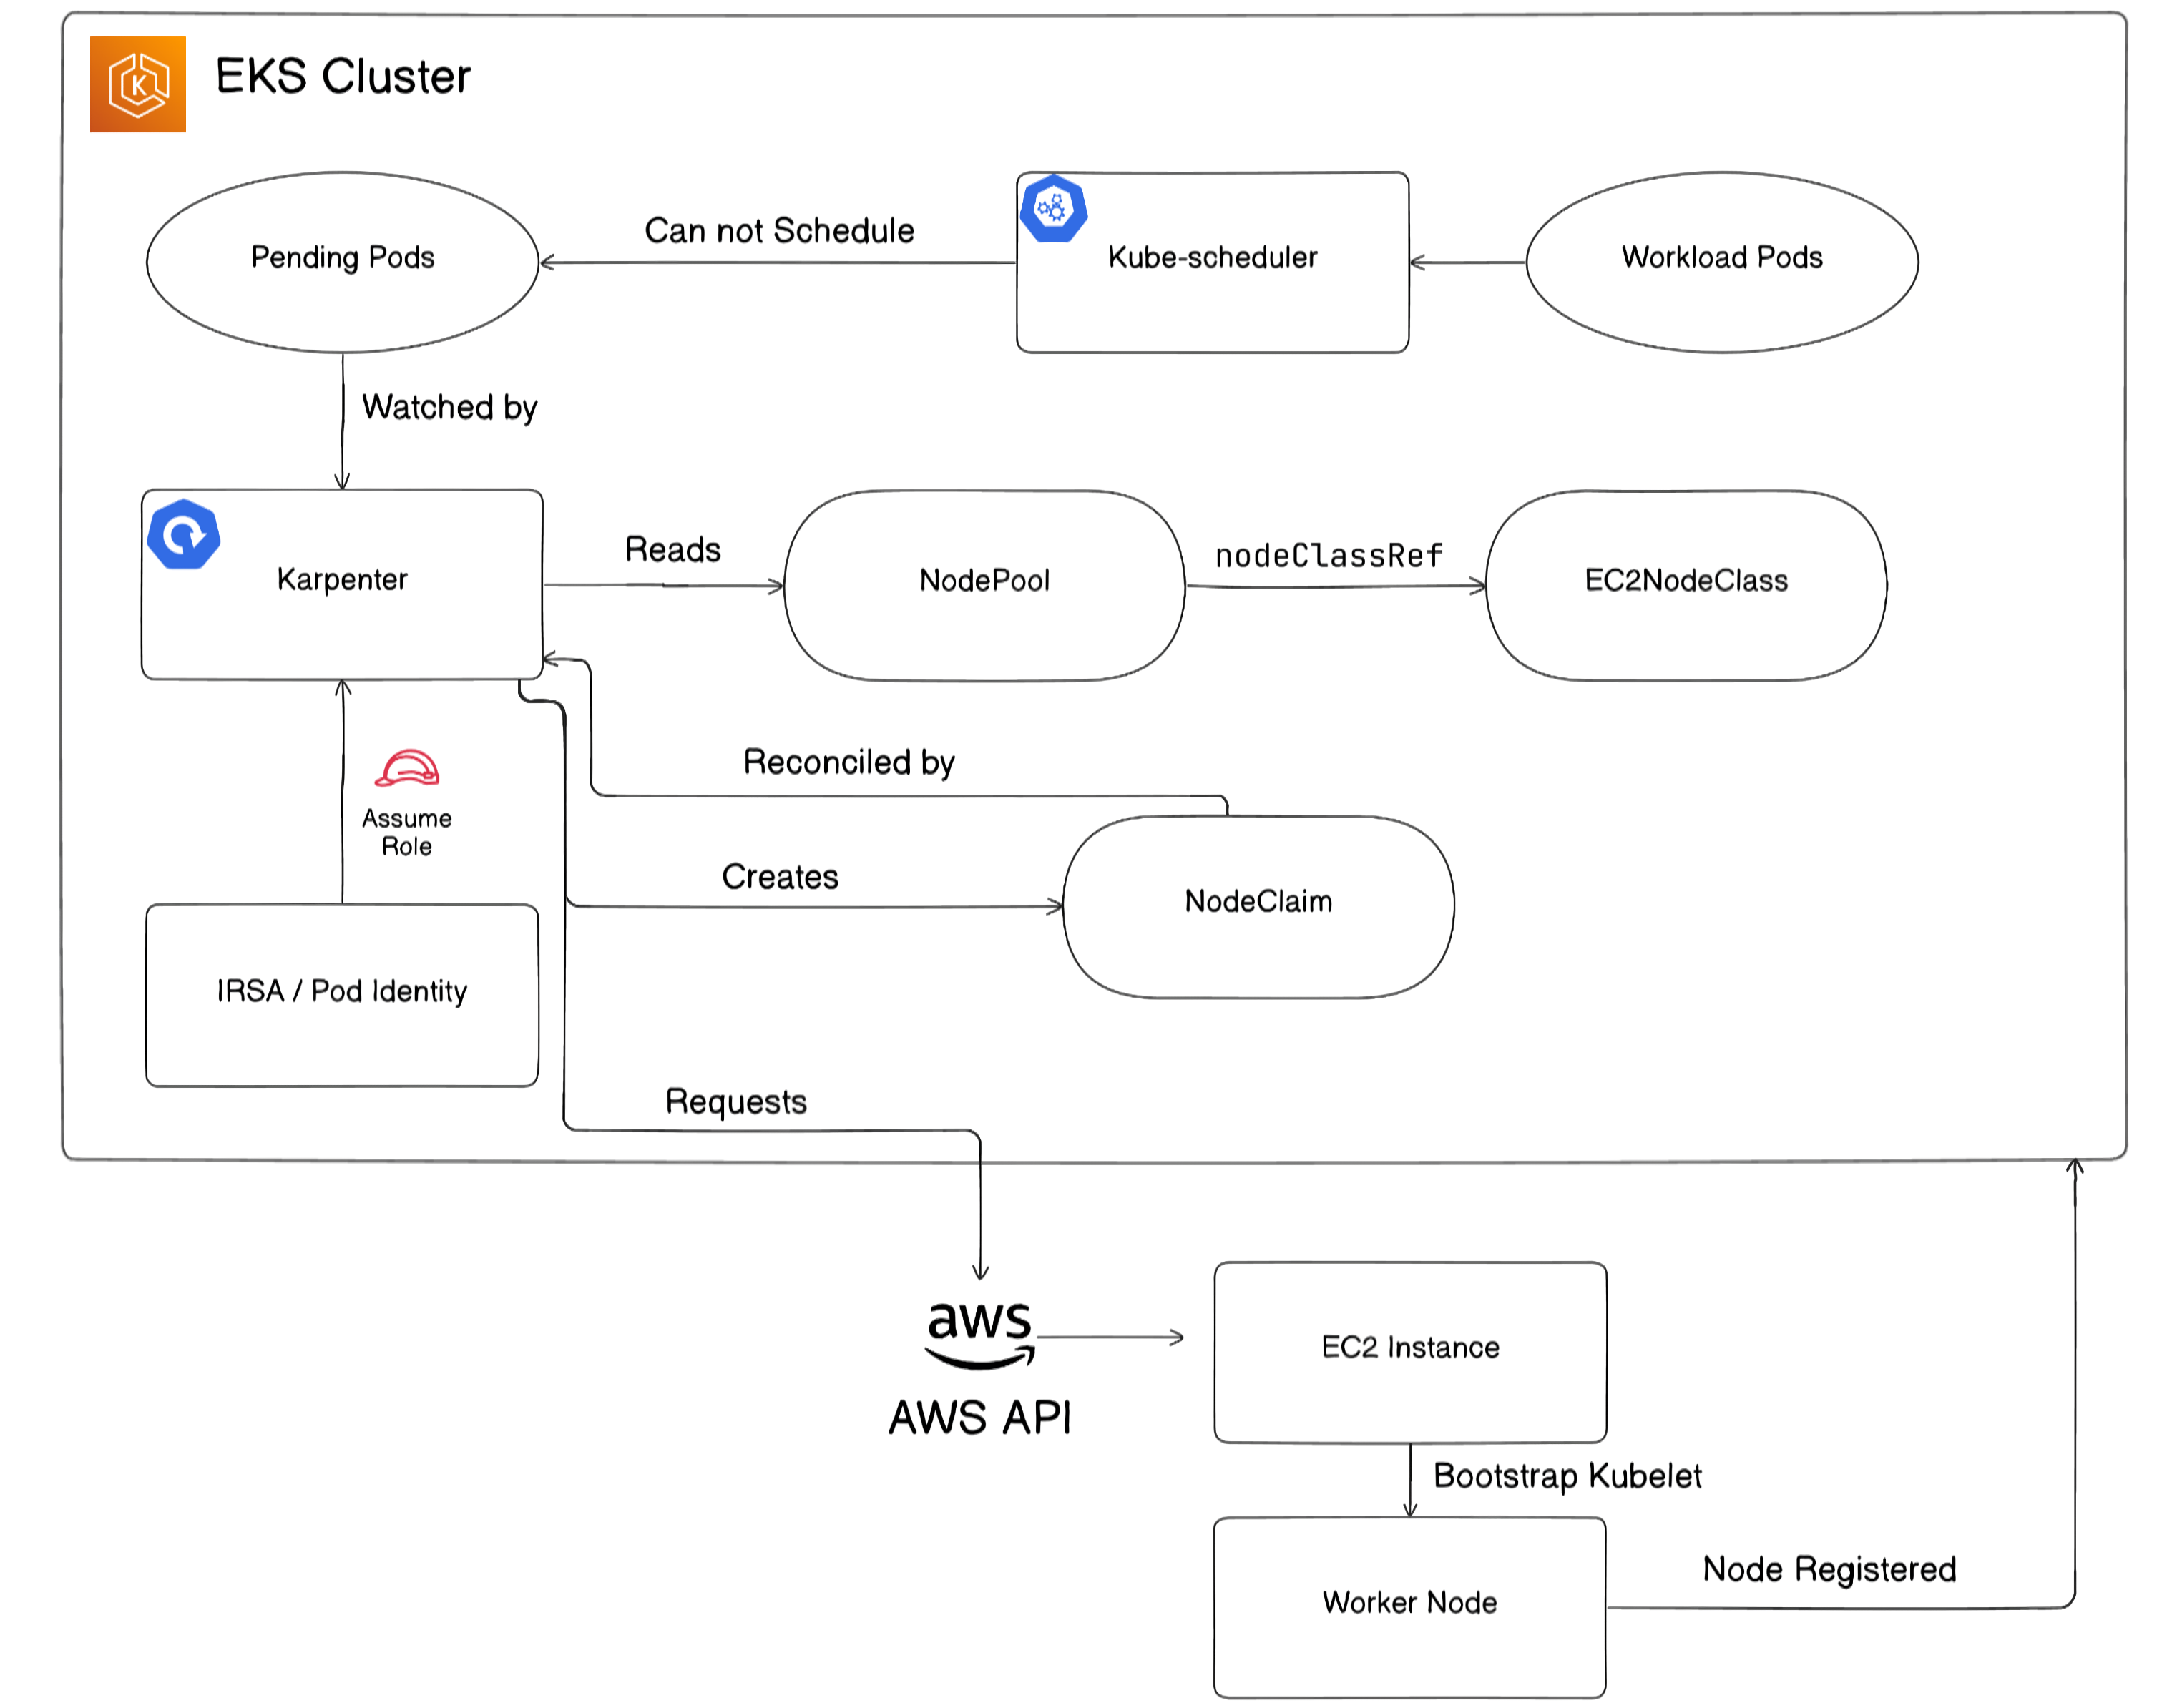
Karpenter provisions new nodes when Kubernetes cannot schedule pods due to insufficient cluster capacity.
The provisioning flow works as follows:
- Karpenter continuously watches for pods that are pending or unschedulable.
- Karpenter selects an appropriate
NodePooland uses its associatedNodeClass, such asEC2NodeClass, to determine how the node should be created. - Karpenter creates a
NodeClaimand requests AWS to launch a new EC2 instance. - The new EC2 instance initializes as an EKS worker node.
- The worker node joins the EKS cluster, allowing the pending pods to be scheduled.
Disruption
Karpenter also manages node disruption. It automatically detects nodes that can be disrupted and creates replacement nodes when needed.
Disruption may happen for several reasons:
- Drift
- The node no longer matches the desired configuration defined in the
NodePoolorNodeClass.
- The node no longer matches the desired configuration defined in the
- Consolidation
- The node is empty.
- The node is underutilized.
- The workloads can be moved to fewer or cheaper nodes.
- Expiration
- The node has reached its configured lifetime, such as
expireAfterin theNodePoolspec.
- The node has reached its configured lifetime, such as
- Interruption
- AWS sends an interruption or termination event for the underlying instance.
Among these, drift-based disruption is usually more important than consolidation because it ensures that nodes stay aligned with the desired cluster configuration.
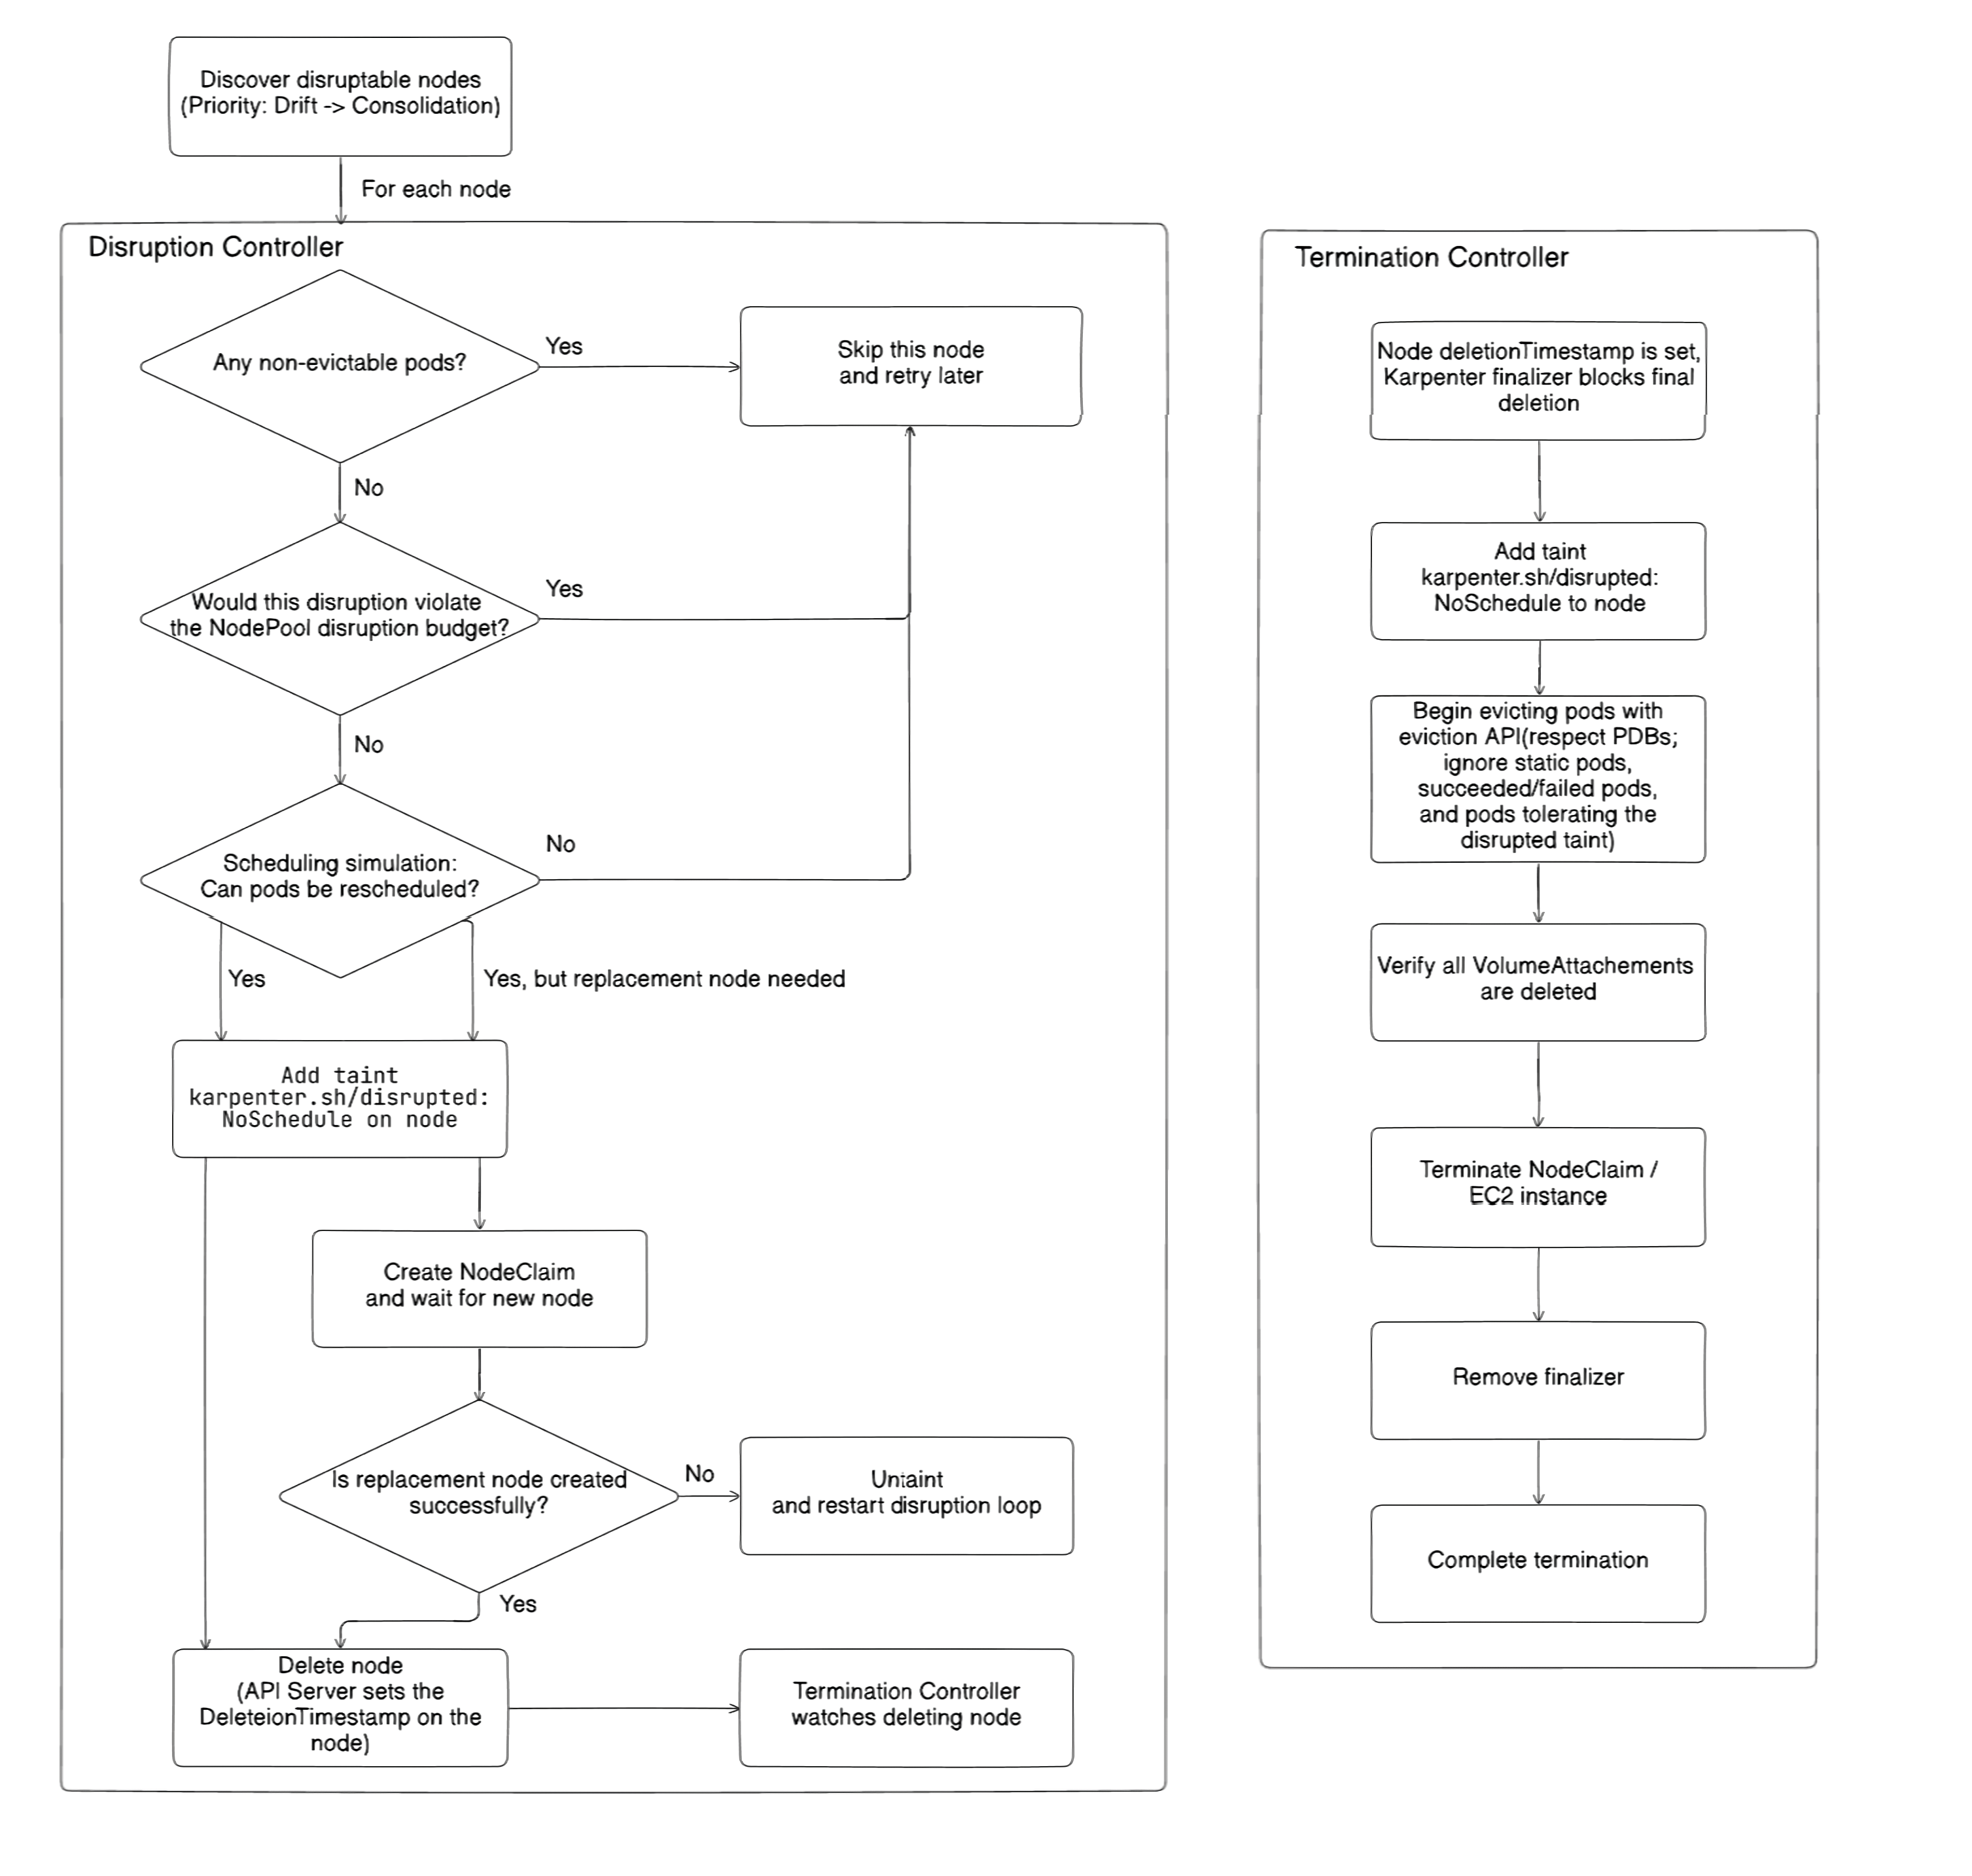
The disruption flow is shown in the following diagram:
Disruption Controller
- Checks whether the pods on the node can be evicted.
- Checks the disruption budget.
- Runs a scheduling simulation to verify that workloads can be rescheduled.
- Adds the taint
karpenter.sh/disrupted:NoScheduleto prevent new pods from being scheduled on the node. - Creates a new
NodeClaimand waits for the replacement node to become ready. - Deletes the node.
Termination Controller
- A
DeletionTimestampis set on the node, and the finalizer blocks immediate deletion. - The taint
karpenter.sh/disrupted:NoScheduleis added. - Pods are evicted through the Kubernetes Eviction API while respecting PDBs.
- Karpenter verifies that all
VolumeAttachmentshave been deleted. - The related
NodeClaimand EC2 instance are terminated. - The finalizer is removed.
- Node deletion is completed.
Why is disruption divided into two phases?
A Karpenter-managed node can be deleted in different ways, such as by runningkubectl delete node <node-name>.
Because of this, the termination process must be separated from the disruption decision-making process. The Termination Controller acts as a graceful node shutdown mechanism, regardless of how the node deletion was triggered.
This is also why the taintkarpenter.sh/disrupted:NoScheduleis added during both processes.
Interruption
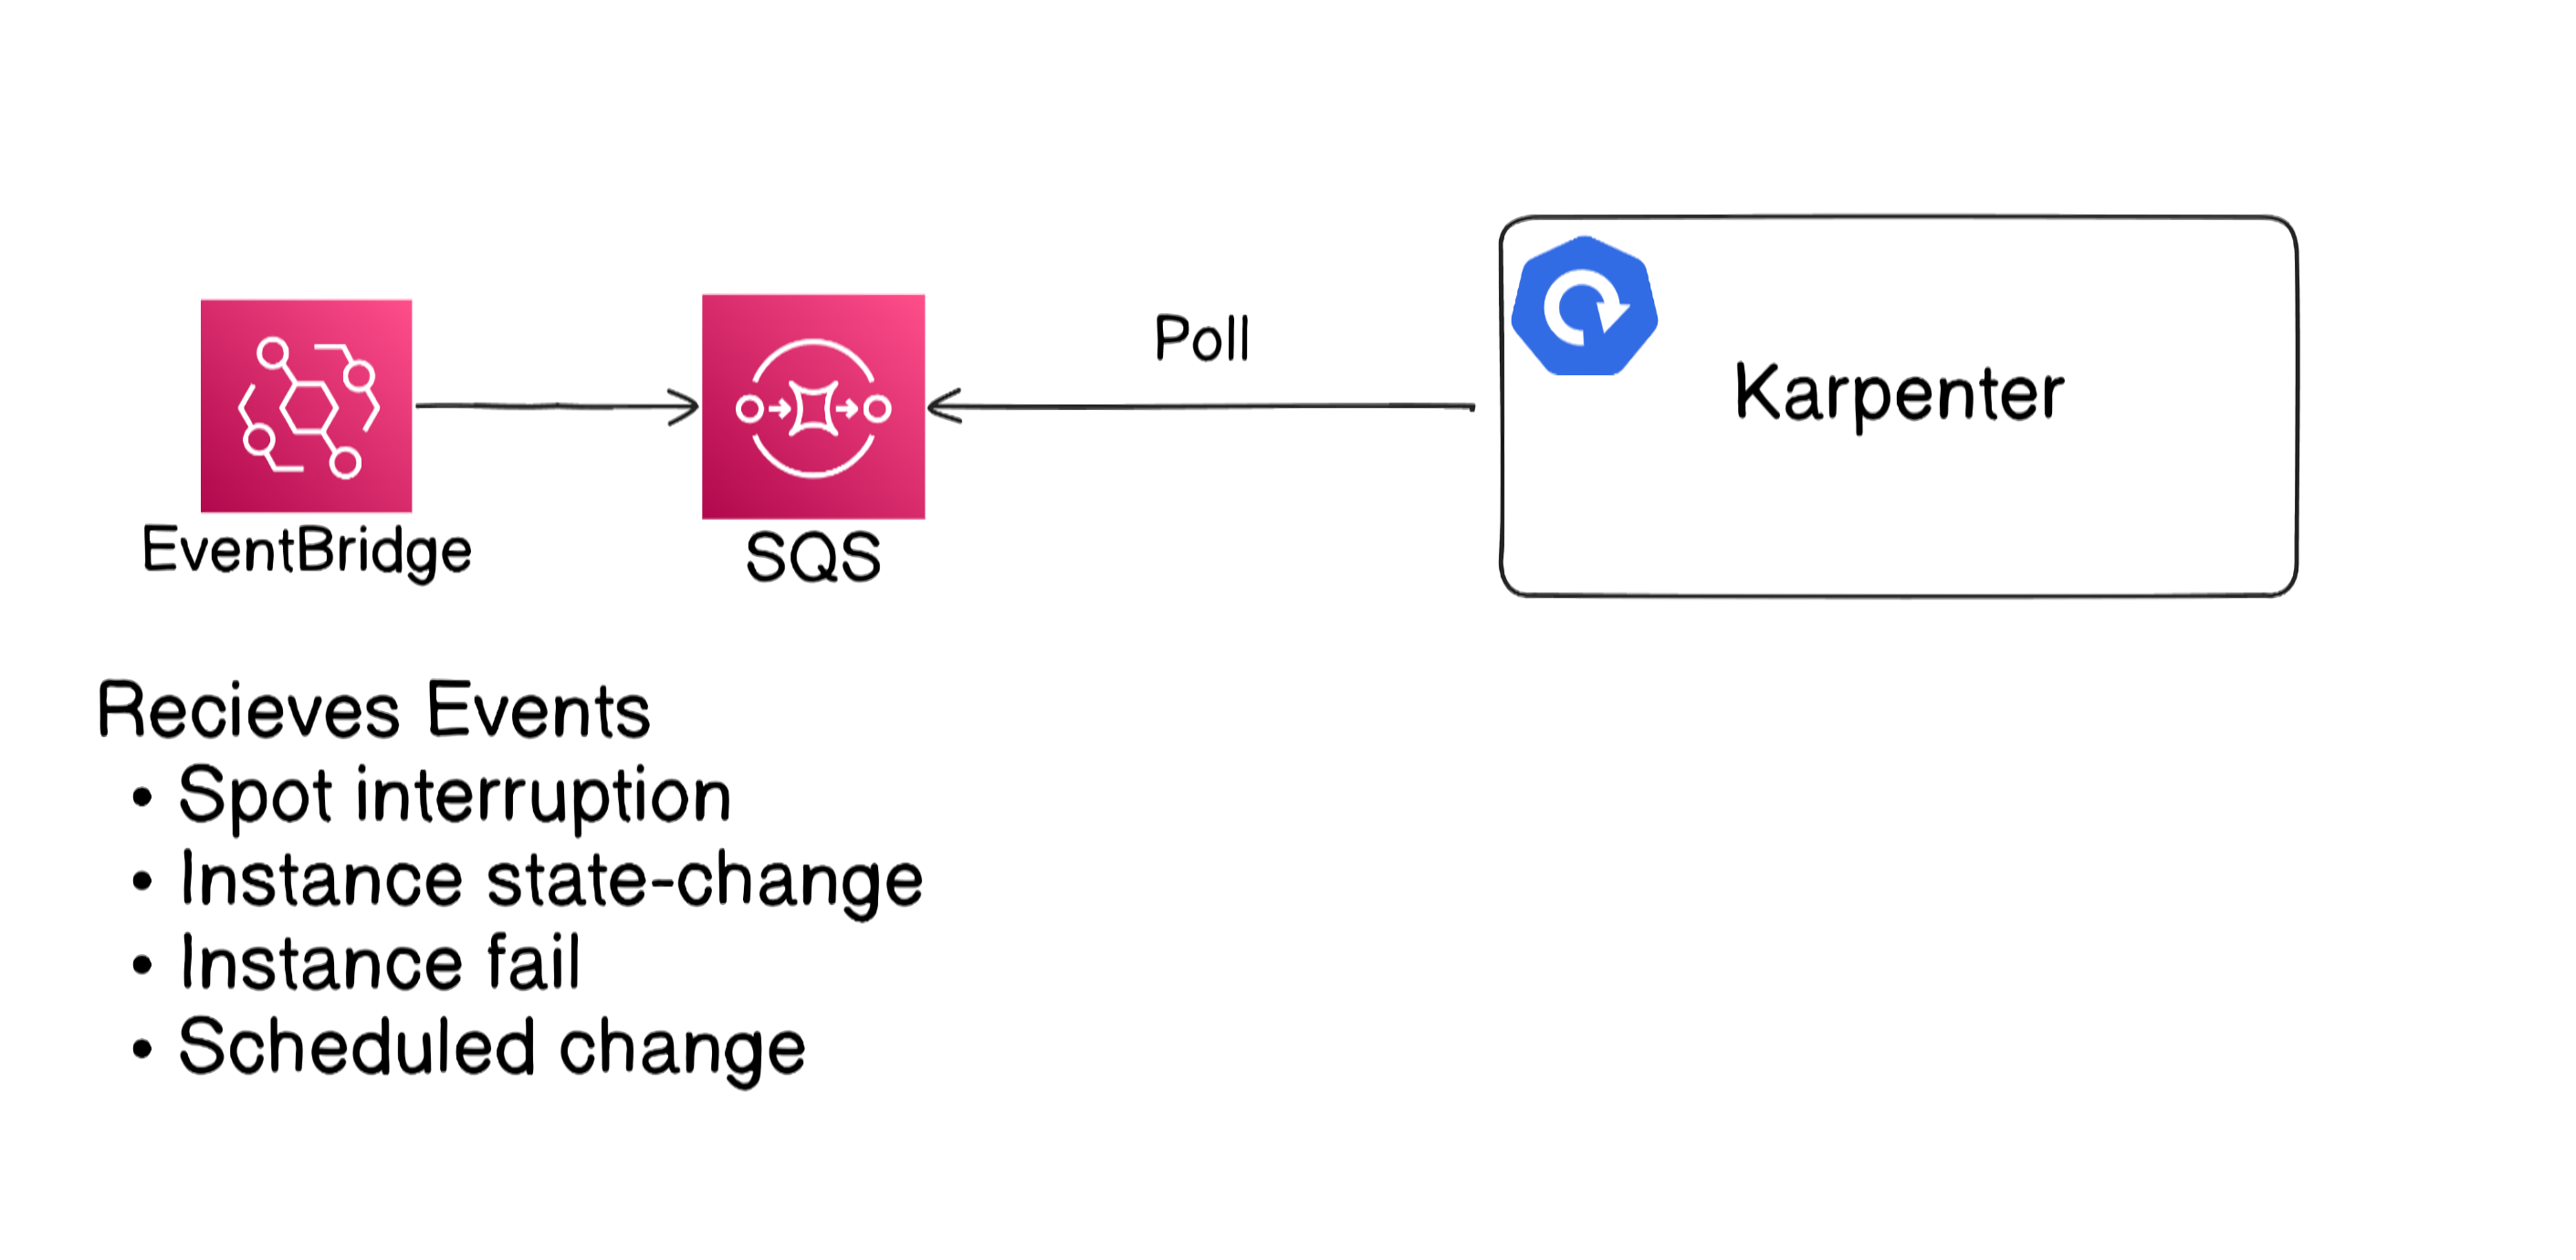
Interruption is a special type of disruption triggered by AWS events.
When an interruption event occurs, Karpenter starts the disruption process for the affected node.
The following events can trigger interruption handling:
- Spot Interruption Warnings
- Scheduled Change Health Events, such as maintenance events
- Instance Terminating Events
- Instance Stopping Events
- Instance Status Check Failures
The interruption flow works as follows:
- An EventBridge rule receives the AWS event.
- The event message is sent to an SQS queue.
- The Karpenter controller periodically polls the SQS queue.
- When Karpenter detects an interruption event, it taints, drains, and terminates the affected node.
For Spot Interruption Warnings, Karpenter provisions a replacement node in parallel while terminating the interrupted node.
AWS also publishes Spot Rebalance Recommendation events. However, these events do not trigger Karpenter’s taint, drain, and terminate logic in the same way.
To enable interruption handling, Karpenter must be started with the following flag:
| |
🍪 Karpenter Prerequisites
Before installing Karpenter, you need to prepare several AWS resources and permissions.
The required prerequisites are:
- IAM role for Karpenter
- Used by the Karpenter controller to call AWS APIs.
- IAM role for Karpenter-provisioned nodes
- Attached to worker nodes launched by Karpenter.
- Subnets for Karpenter-provisioned nodes
- Each subnet must have the
karpenter.sh/discoverytag.
- Each subnet must have the
- Security groups for Karpenter-provisioned nodes
- Each security group must have the
karpenter.sh/discoverytag.
- Each security group must have the
- EKS access entry for Karpenter-provisioned nodes
- The access entry type should be
EC2_LINUXorEC2_WINDOWS, depending on the node operating system.
- The access entry type should be
- Optional: SQS queue
- Required when using Karpenter’s interruption handling feature.
- Optional: EventBridge rule and target
- Used to forward AWS interruption events to the SQS queue.
You can refer to the following IaC examples:
📊 Installing Karpenter with Helm
Karpenter can be installed easily using the official Helm chart.
| |
The main values are:
settings.clusterName: The name of the EKS cluster.settings.interruptionQueue: The SQS queue used for interruption handling.settings.enableZonalShift: Enables zonal shift support, allowing Karpenter to avoid impaired Availability Zones when supported.
⚙️ Configuration Example
NodePool
Here is a simple NodePool example.
To use Karpenter, you need at least one NodePool and one corresponding NodeClass, such as EC2NodeClass.
| |
NodeClass
Here is an EC2NodeClass example.
EC2NodeClass defines AWS-specific node settings, such as the node IAM role, AMI selection, subnet selection, security group selection, and EC2 tags.
| |
🧑🔬 Testing Node Autoscaling
Once your setup is complete, you can test whether Karpenter provisions nodes correctly.
Create a sample nginx deployment with enough replicas and CPU requests to trigger node autoscaling:
| |
This deployment creates 10 pods, each requesting 500m CPU.
If your current cluster does not have enough available capacity, some pods will remain pending. Karpenter should detect those pending pods and provision new worker nodes automatically.
You can watch the pods and nodes with the following commands:
| |
You can also check whether the newly created EC2 instances have the tag defined in your EC2NodeClass:
| |